Oven “Grilled” Parsnips – Could These Replace French Fries?

Oven “Grilled” Parsnips – Could These Replace French Fries?
No chance – but that doesn’t take anything away from this simple, delicious, and quite dip-able roasted parsnips recipe. As I mention in the video, I was inspired by some grilled parsnips that showed up as a side dish at a recent meal, and I wanted that same effect without having to go out to the backyard.

The combination of a very hot oven, the generous cooking time, and a pre-roast, lemon-olive oil soak gets you pretty close to grill marks country. Also, this method seems to mellow the root’s bold flavor, and while the outside remains pleasantly fibrous, the inside gets creamy and sweet.

One note about the use of lemon here: As anyone who has ever tried to cook raw green beans in a tomato sauce will tell you, an acidic cooking liquid can toughen the surface of a vegetable. I learned why in culinary school, but that was in 1984, and I’m kind of fuzzy on anything before the Clinton administration. I’m sure one of our resident scientists will chime in with a concise explanation.

Anyway, whether you’re looking for a new and exciting side dish, or something to dip into aioli besides potatoes, I hope you give this oven “grilled” parsnips recipe a try. Enjoy!


Ingredients for 6 servings:
2 pounds parsnips
juice of one lemon
2 tbsp olive oil
salt and pepper to taste
*Aleppo pepper, to taste

*Aleppo pepper is my new favorite ground chili pepper! It’s a moderately hot and fruity pepper that’s said to have “cumin-like undertones,” as Wikipedia puts it.

Cronuts! The Doughnuts That Make People Go Nuts! Part 1: The Dough

Cronuts! The Doughnuts That Make People Go Nuts! Part 1: The Dough
I’m assuming that since you’re on a food blog you've probably heard about “cronuts,” but just in case, here’s a quick review. 

This croissant/doughnut hybrid was invented by Dominique Ansel at the Dominique Ansel Bakery in New York City. It became an overnight sensation, and now people stand in line for hours just for a chance at getting one of the precious few that are made each day.

Why all the hype? Very simple – it has the shape and flavor of a doughnut, yet features the crispy, flaky texture of a buttery croissant. What’s not to hype? Anyway, after seeing like two dozen new reports on the craze, and receiving a scary number of food wishes for it, I decided to give it a go, if for no other reason than to save a few of my NYC friends the humiliation of being Instagrammed standing in that line.

Cronuts! The Doughnuts That Make People Go Nuts! Part 1: The Dough
Since I’ve never tasted a cronut, what follows is purely an educated guess, but I think I got pretty close. Maybe one of you New Yorkers will mail me one, so I know for sure? My game plan was simple. Make a slightly sweet, yeasty, doughnut-esque dough, which I’d then layer with butter, using the classic croissant technique.

It’s a procedure I do all the time, as in once, back in culinary school, thirty years ago. So, instead of going by the book, or even looking in a book, I winged it, and not only that, I streamlined things too. Instead painstakingly pounding out perfectly sized slabs of cold butter, I decided to try simply spreading softened butter instead. I also threw caution to the wind, and pulled off the rare and terrifying “double fold and turn,” and lived to tell the tale.

Like I said in the video, we’ll cover the final results in Part 2, but spoiler alert…these were awesome. I did two different versions, one regular, and one with an extra “fold and turn” which resulted in a taller, and even more impressive cronut. Stay tuned!


Ingredients for 16 Cronuts:
1 package dry active yeast (2 1/4 tsp)
1/2 cup warm water (105 degrees F.)
1 teaspoon fine salt
2 tablespoons white sugar
1/2 cup milk
2 tablespoons melted butter
1 teaspoon of vanilla extract
1 large egg
1/8 teaspoon ground nutmeg
1 pound all-purpose flour, more as needed
6 ounces soft, unsalted, "European-style" butter (12 tablespoons)

Fist steps:
- Combine yeast and warm water, and let sit five minutes.
- Add the rest of the ingredients, except for the flour and the European-style butter, and whisk to combine.
- Add the flour, and knead for about three minutes or until a soft sticky dough ball forms.
- Wrap dough in plastic, and refrigerate for 20 minutes.
- Roll dough out into roughly a 18 x 9-inch rectangle.
- Proceed with butter as shown!

Cashew Chicken – Keeping it Not Real

Cashew Chicken – Keeping it Not Real
Grilling season is rapidly approaching, and chances are good that at some point you’ll be faced with a few leftover grilled chicken breasts. Will you take the easy way out, and make chicken salad? Or, will you be brave and attempt something way more interesting, like this Cashew Chicken? Probably the chicken salad, but I decided to post this just in case.

Yes, I’m at it again, making food that’s not trying to be Asian, yet looks close enough to upset people anyway. I can’t do anything about that, and won't be dissuaded from using sweet, rich cashews, and a spicy, sweet and sour sauce to disappear some leftover, grilled chicken just because some people will get annoyed.

Sure, there are a hundred ways to make it “better” or more “authentic,” but on a weeknight after a long day at work, with your show coming on in 20 minutes, none of that matters. This isn't about what you think when you taste it; it’s about what you don’t think. And what you don’t think is, “this is leftover chicken.”

Having said all that, I would be shocked and amazed if you didn’t tweak this to your own personal tastes. It really is a versatile recipe, and one I hope you try soon. Now, get out there and grill too much chicken, and as always, enjoy!


Ingredients for 2 large portions:
2 tbsp vegetable oil
6-8 thin slices of fresh ginger root
1 hot red chili pepper, sliced
1/2 cup dry roasted cashews
2 cloves garlic, sliced
1 to 1 1/2 pound cooked chicken breast (about 2-3 breasts), cut into 1-inch cubes
For the sauce:
1/2 cup cold water or chicken broth, more as needed
1 tbsp cornstarch
1 tbsp ketchup
1 1/2 tbsp rice vinegar
1 tbsp soy sauce, more as needed
2 tsp sambal (hot ground chili sauce)
1 packed tbsp brown sugar
juice of one lemon
1/4 cup chopped cilantro

How to Reduce Energy Emptiness in Your Computer

How to Reduce Energy Emptiness in Your Computer
How to Reduce Energy Emptiness in Your Computer - SAVE energy can range from trivial. One is through the use of braking features on personal computer (PC) or laptop. Nowadays, almost everyone has a laptop or PC. Consciously or not, it turns out this sophisticated devices suck up a lot of electricity. So not too extravagant, there are a few energy consumption tips for mengemat on your PC and laptop.

Hibernate
The hibernate mode is the facility to shut down, but not shut down or turn off programs that are in the open application on the run know. With this mode, the contents of main memory (RAM) will be stored in the hard drive.

Standby
In order to save energy, should pengturan monitor and hard disks are in the lowest part in the standby mode, If you want to leave the computer for a while, you should activate the standby mode.

But it must be in the know, when active standby mode, the data has not been saved will be damaged or lost. Should first save your data or documents before entered standby mode.

Charge the Battery
If the laptop is being charge battery, preferably up to 100% occupied. Because prosses charge that carried a half-and-half instead spend a lot of energy.

If you want to go, you should take a backup laptop battery. To save on battery consumption, you can enable the Hibernate feature / Suspended or use the electric socket is connected to the mains.

Uninstall Flash
Try not to plug the USB port too long, If the transfer to a flash or external hard drive is complete, you should immediately off. Because the equipment also spent force or energy.

A few of the article How to Reduce Energy Emptiness in your computer may be useful for you :)

Homemade Ketchup Because You’re Crazy Like That

Homemade Ketchup Because You’re Crazy Like That
I want to be very clear that I’m posting this copycat recipe for ketchup only because I’ve received countless food wishes for it, and not because I think it’s a great idea. It’s not even a good idea.  

This tweet I posted yesterday sums things up nicely,  “Making some homemade ketchup. Sure it costs more, and doesn't taste as good as store bought, but at least it takes a really long time to do.”

Of course, we’ve made lots of things that are generally better not homemade, like French fries and fried chicken, but this is much different. For most Americans, ketchup is one of our first taste memories, and if the flavor profile is even the slightest bit off, our brain computes this as “ketchup fail.”

Having said that, I’m very proud of how close this ketchup does come to those name brands in terms of taste, texture and color. I’ve never had a tomato paste-based ketchup that I liked, so I decided to cook down crushed tomatoes instead. This would require many hours of stirring on the stove, but by using the slow cooker, we take most of the labor out of the process. Sure it'll still take many hours to reduce down to a ketchup, but it will only require giving it a quick stir every hour or two.

As I joke about in the video (not really a joke), you’d have to be crazy to make your own ketchup, but despite my warnings, I know in my heart that many of you will give this a try nonetheless, and that makes me happy. Enjoy!


Ingredients to make 3 cups of Ketchup:
2 cans (28-oz) ground tomatoes (you can also used crushed, or just crush whole plum tomatoes)
2/3 cups white sugar
3/4 cup white distilled vinegar
1 teaspoon onion powder (not salt!)
1/2 teaspoon garlic powder (not salt!)
1 3/4 teaspoon salt
1/8 teaspoon celery salt
1/8 teaspoon mustard powder
1/4 tsp finely ground black pepper
1 whole clove
* Cook on the high setting in an uncovered slow cooker until the mixture is reduced by about half and very thick. By the way, my “high” setting isn’t very high, so it took like 10 hours, but don’t rely on a time. Simply cook until it looks like mine did before I strained it.

Shrimp & Jalapeno Nachos for Cinco de Mayo or Cinco de Anytime

Shrimp & Jalapeno Nachos for Cinco de Mayo or Cinco de Anytime
These simple and addictive shrimp and jalapeno nachos are not only a nice alternative to more common versions, but a great reminder of how this iconic snack was actually intended to be served. Contrary to current fashion, nachos didn’t start out as a giant pile of chips drenched in ladles of florescent gold cheese sauce.

The earliest versions were made by simply broiling a single layer of cheese-topped chips, which were then garnished with jalapeno peppers – simple and elegant, with every chip genetically identical to the next. Over time we’ve added hundreds of toppings, as well as replaced the broiled (real) cheese with something that you can also use to grease an axel.

Don’t get me wrong, I enjoy the aforementioned version just as much as the next guy wearing pajama jeans, but once in a while it’s good to revisit a simpler time in American snacking. If you’re planning to party, I wish you a fun and safe Cinco de Mayo, and hope you give these very tasty chips a try. Enjoy!


Ingredients for 4 Portions:
1 pound peeled and deveined shrimp (I used 50-60 per pounds size, which are ideal for this)
1 tbsp vegetable or olive oil
pinch of cayenne
1/4 tsp ground chipotle pepper
salt and pepper to taste
50-60 large tortilla chips, or as needed
2 jalapeno peppers, sliced very thin
about 3 1/2 cups of shredded Monterey Jack or cheddar cheese
avocado creama (1 avocado, 1 cup sour cream, and juice of 1 lemon or 2 limes; liquefied in a blender)
sliced cherry tomatoes and freshly chopped cilantro to garnish

How to Clean Laptop LCD Screen

How to Clean Laptop LCD Screen
How to Clean Laptop LCD Screen. Handwriting dirt and food sometimes imprint on notebook or laptop screen is slightly disturbing visions and hygiene laptop, therefore on this occasion I want to give you a little tutorial for how to clean the LCD screen laptop or notebook. Here are the steps:

  1. Prepare the camera wipes or cleaning wipes.
  2. Use specially LCD screen cleaner water, or glass cleaner Cling.
  3. LCD cleaning spray water when atu Cling not too much, because it can trickle down the screen and into the screen which can damage the components of your Laptop and LCD screens.
  4. Rub a tissue or soft cloth with rubbing in one direction, so that the dirt can be decomposed into the side.
  5. When finished dry with a soft cloth or dry tissue.
  6. A little extra time off Laptop screen cleaning, and do not exert too much pressure when cleaning the LCD screen, do not clean it with something rough surface due to scratching the screen.
A few of my article this time, may be useful :)

Tastes and Smells Like Easter

Tastes and Smells Like Easter
For those of you that celebrate, I hope you have a wonderful Easter weekend. And even if you're not a true believer, you may still score a chocolate bunny or marshmallow chicken, so you've got that going for you. Speaking of Easter edibles, for me there's one signature taste and smell that rises above all others; anise-scented Easter bread! 

Below you'll see my family's recipe for Italian Easter bread, and if you've never experienced this aromatic, and very addictive sweet bread before, I highly recommend you "rise" from the couch, and give it a try. You can read the original post and get the ingredients here. Enjoy!

A Friendly Pasta Primavera Reminder

A Friendly Pasta Primavera Reminder
This Pasta Primavera is one of my favorite spring recipes of all time, so I thought I'd post a little reminder just in case you have an opening in your meal plan this week. If you haven't yet, do yourself a favor and try this dish! It's truly one of life's simple, and very green, pleasures. Enjoy!

Rack of Lamb with Blueberry Beurre Rouge – Small, Dark and Handsome New Twist

Rack of Lamb with Blueberry Beurre Rouge – Small, Dark and Handsome New Twist
This Easter-inspired rack of lamb recipe is fairly typical of other dishes I’ve posted with this cut, except for one major difference; we’re actually roasting the meat over the sauce. And not just any sauce; we spiked this beurre rouge (red wine butter sauce) with fresh blueberries, and the small, dark fruit performed beautifully.

My game plan was to introduce some always-welcomed moisture into the cooking environment, as well as hopefully impart some flavor and aroma from the berries, shallots and wine. Both goals were realized, and I was very happy with the final results. Besides possibly straining the cooked berries out next time, I think it was pretty close to spot on.

Rack of Lamb with Blueberry Beurre Rouge – Small, Dark and Handsome New Twist
One word of warning to you poor, unfortunate souls who will insist on cooking this longer: Beside the obvious crime against nature of not eating this pink, you’ll also risk having your sauce dry up and burn in the oven. So, if you are going longer than the 20 minutes recommended here, be sure to check the pan, and add a splash of water if needed.

Other than that, as long as you’re checking with a thermometer, I don’t think there’s a lot that can go wrong. The sauce is very simple to finish up as your lamb rests, and quite similar to most of the pan sauces you’ve seen posted here before. So, if you’re looking for something a little bit usual for your Easter menu, I hope you consider giving this a try…it was berry good! Enjoy!


Ingredients for 4 portions:
2 fully trimmed, racks of lamb (8 bone each)
salt and pepper to taste
1 tbsp vegetable oil for browning
2 tsp Dijon mustard
1 tsp minced fresh rosemary
1/8 tsp cinnamon
1/8 tsp ground cumin
1/3 cup sliced shallot
4 oz (about a cup) fresh blueberries
1 cup decent red wine
1 tbsp balsamic vinegar
1 or 2 tbsp butter, whisked into finished sauce

How to Blueberry Pancakes

How to Blueberry Pancakes
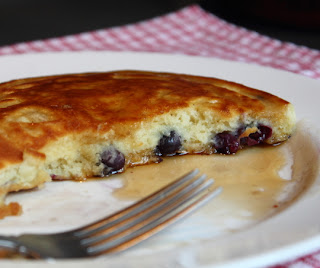
Breakfast items are one of the most popular food wishes around here, and while this isn’t technically a recipe, it is a critical technique to learn if you want to enjoy blueberry pancakes at their most delicious. 

Not only does this simple method ensure even distribution, but instead of dry, barely warm fruit, your blueberries will be hot, sweet, and bursting with juice. As far as the batter goes, you are on your own, but if you get stuck, try this old fashioned pancake recipe we posted a few years ago. It gets great reviews!

This video was actually inspired by a recent visit to a diner where I heard someone nearby order blueberry pancakes. That sounds pretty good, I thought to myself, momentarily regretting my decision corned beef hash. Well, good thing I stuck with the hash, as what came out was not blueberry pancakes, but pancakes with a handful of fresh blueberries tossed over the top.

Sorry, but those aren’t blueberry pancakes. No, the blueberries must be cooked inside the batter…but, just not too inside. By “throwing down” you’ll guarantee perfect cake/fruit integration every time. Of course this will work with other berries or cut up fruit, so feel free to try with anything you can grip. I hope you give this great technique a try soon. Enjoy!

Bourbon-Glazed Carrots – An Easter Side Dish that Really Shines

Bourbon-Glazed Carrots – An Easter Side Dish that Really Shines
miela-tahril.blogspot.com - Before all you cardiologists out there start a petition drive to have my channel removed from YouTube, let me add the following disclaimer: These butter-soaked, bourbon-glazed carrots should be enjoyed no more than twice a year. 

Okay, now that we got that out of the way, I can go ahead and tell you that this is, in my humble opinion, the greatest, special-occasion carrot side dish of all time. Sweet, savory, and oh so glossy.

And yes, as unreasonable as it sounds, you do need bourbon to make bourbon-glazed carrots. What happens if you just make this recipe and use water instead of the whiskey? You get glazed carrots. Close, but no cigar. By the way, in related news, bourbon also pairs very well with cigars. Anyway, if you’re looking for a stellar, and very shiny vegetable side dish for your Easter celebration, I hope you give these bourbon-glazed carrots a try. Enjoy!


Ingredients for 6-8 Portions:
1 stick (4-oz) butter
2 or 3 pounds carrots, peeled, cut into equal-sized pieces
1/2 to 1 tsp fine salt, or to taste
1/2 cup bourbon or any kind of whiskey
1/3 cup brown sugar
freshly ground black pepper and cayenne to taste
fresh thyme leaves to garnish, optional

Beef & Guinness Stew – Drinking AND Eating Beer on St. Patrick's Day

Beef & Guinness Stew – Drinking AND Eating Beer on St. Patrick's Day
While I’ve never been a huge fan of drinking Guinness, I’ve always been a great admirer of how wonderfully it can elevate a simple beef stew. The subtle bitterness from the hops, and toastiness from the malt, gives the gravy a depth of flavor that I really love.

Besides, you only need one can for this St. Patrick's Day-inspired stew, and since they’re sold in 4-can packs…well, you can do the math. This would normally be the point in post where I’d make my annual Irish drinking joke, but I’m not doing one this year.

Not only is it inappropriate, but it’s culturally insensitive, and I’d like to think I’ve matured past the point of going for such cheap laughs. Besides, my Irish joke writer, Paddy O'Sullivan, was on a binge this week, so I never got one from him anyway. Oh well, like I said, probably for the best.

Anyway, if you’re looking for a gorgeous and incredibly delicious Irish stew recipe for your St. Patrick's Day menu, this one comes highly recommended. I served mine with some green onion mashed potatoes, and while I usually encourage you to serve things like this on whatever you want, not this time. You must serve this with some form of potato. And that is no joke. I hope you give this a try soon. Enjoy!


Ingredients for 4 large servings:
4 strips bacon, sliced into small pieces
2 1/2 lb. beef chuck, cut in 2-inch pieces (tossed with black pepper and at least 1 tsp salt)
2 onions, chopped
1/2 tsp salt
4 cloves garlic, minced
1 can (14.0-oz) Guinness beer, or other dark beer
1/4 cup tomato paste
4 sprigs of fresh thyme
3 carrots, cut in 1-inch pieces
2 ribs celery, cut in 1-inch pieces
2 1/2 cups chicken stock, or as needed
1 tsp sugar
salt and freshly ground black pepper to taste
4 cups mashed potatoes, optional (not really)
- Simmer stew on very low heat, covered, for about 2 hours, or until fork tender
- Uncover, raise heat to med-high, and reduce, stirring occasionally, until sauce thickens to your liking
- Taste and adjust seasoning!

Apple Hand Pies – Crimping is Easy

Apple Hand Pies – Crimping is Easy
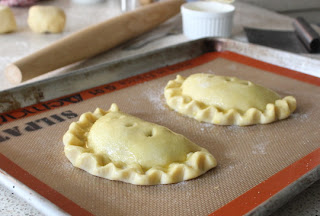
I've been playing around with a new pastry dough, and figured I'd use it as an excuse for a little demo on turnovers, or "hand pies" as the hipsters are calling them.


I'll unveil the new "buttercrust" dough next week, but this particular video is not about the pastry, or the filling, it's about the fairly basic method for folding and crimping one of these up.


Apple Hand Pies – Crimping is Easy
As you’ll see, it’s not exactly a complicated procedure. In fact, I can’t imagine your aunt is going to be too thrilled to know that you’ll be able to now match her crimp for crimp. Once you have the outside down, what goes inside should be the least of your worries.

I went for a very soft, apple-saucy, jam-like filling, roomates turned out very well, but literally any of your favorite pie fillings, both sweet and savory, will work. If you do the make an apple version, and want to really blow some minds, filling your top with a thin slice of sharp cheddar. It's special. I hope you give this easy technique a try soon. Enjoy!


For 4 Apple Hand Pies:
about 1 pound pie dough, divided into 4
egg wash (1 egg beaten with 2 tsp milk)
granulated sugar as needed
For the apple filling:
2 tbsp butter, browned
2 or 3 green apples
1/4 tsp salt
1/4 cup white sugar
2 tbsp brown sugar
1 1/2 tsp cinnamon, or to taste
1 or 2 tsp of water if needed

Orange Cumin Vinaigrette featuring the Old "Make-n-Shake" Salad Dressing Method

Orange Cumin Vinaigrette featuring the Old "Make-n-Shake" Salad Dressing Method
One of the first things you’re taught at culinary school is how to make an emulsified salad dressing. Of course, we were no longer allowed to call them “dressings,” and had to refer to them by the proper French name, “vinaigrette,” but I knew deep down they were the same thing.

After learning how to spell “vinaigrette,” which I’m still working on to this day, we were set up with bowls and whisks, and shown how to properly achieve the celebrated emulsification. The chefs demonstrated that by slowly dripping oil into vinegar while whisking like crazy, one could magically bond the two elements together.

It took quite a while, and despite a burning shoulder, and cramping forearm, the method did work beautifully. The dressing was perfectly emulsified, and stayed that way. I was impressed. Of course, the next day they showed us how to do the same thing in a blender in 10 seconds, which really annoyed everybody. Why not show us the easy way first?

Well, little did I know there was even an easier way, than the easier way. That’s right, I’m talking about the old “make-n-shake” salad dressing method. By simply shaking vigorously in a small jar, you can create a temporary emulsification that should stay blended more than long enough to dress a salad.

Now let’s be clear, this method should only be used if you are going to eat your salad right away. The good news is, this accounts for roughly 95% of salad-related scenarios. For the rest of the time, when you need the dressing to stay perfectly blended for hours, like on a buffet, you should use the classic method instead.

Anyway, I'd promised to show you the very tasty orange and cumin vinaigrette that we used on our raw kale salad, and I figured it was the perfect excuse to demo this simple salad dressing trick. I hope you give it a try soon. Enjoy!


Ingredients (makes about 3/4 cup):
1 rounded teaspoon Dijon mustard           
1 rounded teaspoon orange zest
1 tsp cumin, or to taste
1/4 tsp red pepper flakes, or to taste
1 tbsp fresh orange juice
1/4 cup rice vinegar (or white wine or sherry vinegar)
1/3 cup olive oil, or to taste
salt and pepper to taste

Crème Caramel – Maybe the Best Dessert Ever

Crème Caramel – Maybe the Best Dessert Ever
It would be impossible to pick a “World’s Greatest Dessert,” but if you’re going to have that conversation, the classic crème caramel has to be part of the discussion. When you combine stunning looks with amazing taste and texture, this classic is hard to beat. The way the almost-burnt caramel layer gets fused on, becomes one with, the creamy custard is nothing short of magic. Crème brulee gets more press, but people that know, know.

If my plea for you to use crème fraiche goes unheeded, yes, heavy cream will work here, but the subtle tang and nuttiness you get from the fermented cream takes this to places the regular stuff just can’t. It also seems to add some extra smoothness to the texture, and make no mistake; the mouthfeel with this classic is just as critical as the flavor.

Crème Caramel – Maybe the Best Dessert Ever
I've not tested my theory, but other substitutions like buttermilk and sour cream should also work similarly. If you do not have Grand Marnier, just using vanilla is fine, but the vague scent of orange rind that it provides the custard is really nice.

You also have the freedom to change the size and shape of your ramekins. Whether you use fewer, larger ones, or a larger number of smaller-sized ramekins, the procedure will work exactly the same. Of course, you'll have to adjust the cooking times, but the "just set" doneness test will be your ultimate guide. I hope you give these classic treats a try soon. Enjoy!


Ingredients for 4 (6.5 oz) Crème Caramels:
*Scant 1/2 cup sugar, melted over medium heat until a dark caramel forms (just a tad less than a full half cup)
1 large egg
3 large egg yolks
1/4 tsp salt
1/4 cup sugar
1 tsp vanilla
1/2 tsp Grand Marnier
1/2 cup crème fraiche
1/2 cup milk
Bake at 325 F for about 45-50 minutes, or until just set.

Creamy Blue Cheese Dressing – Chicken Wings Sold Separately

Creamy Blue Cheese Dressing – Chicken Wings Sold Separately
Some of you might think I’m posting this creamy blue cheese dressing recipe while on vacation, just so I don’t have to answer questions as to why it took five years for this popular food wish to appear. And, while I don’t have a great answer for that, I do have a “grate” answer.

That’s right, a cheese grater and a wedge of frozen blue cheese is real the secret behind a perfect creamy blue cheese dressing. Not only is crumbling blue cheese a messy operation, but those larger chunks sink to the bottom, and don’t become one with sauce. 

Using this technique produces a dressing exploding with the funky goodness of whichever blue-veined cheese you decide to use. I used a Maytag blue cheese, but any of the World’s great blues, like Roquefort or Stilton, will work beautifully. I hope you give this great method a try soon. Enjoy!


Makes about 3 1/4 cups Creamy Blue Cheese Dressing:
 *Please note: everything in this recipe is “to taste,” so adjust to your liking!
1 cup mayonnaise
1 cup sour cream
3/4 cup buttermilk
1 teaspoon crushed garlic
1/2 teaspoon ground black pepper
1/2 teaspoon dry mustard
1/2 teaspoon salt, or to taste
1/2 teaspoon sugar
cayenne to taste
1 teaspoon Worcestershire sauce
4 ounces frozen blue cheese, grated

Gooder and Good

Gooder and Good - Hello there! I wanted to share two cellphone shots I took this weekend, along with a couple of announcements. When I posted our watermelon agua fresca video last week, I got a bunch of comments on YouTube saying that cantaloupe makes an even better one. So, I had to immediately test one out, and...it's a tie. Both melons make marvelous agua frescas! 

Also, I've started playing around with the "cronut." This croissant/doughnut hybrid has all the food fetishists in a tizzy, and I was encouraged by this first attempt. Not sure exactly when it might make its official appearance, but stay tuned!

Gooder and Good Miela Tahril

New York Style "Sunshine" Cheesecake - Crack isn't Necessarily Whack

New York Style "Sunshine" Cheesecake - Crack isn't Necessarily WhackThis is my favorite recipe for New York style cheesecake, and includes a great technique for letting the citrus-kissed cake finish in the oven, so that no crack forms when cool. As you'll hear and see in the video, this isn't always the case.
It's ironic that the largest, deepest, most jagged cheesecake crack I've ever experienced would occur on the one I'm filming for a video recipe. I've seen this method used to produce completely crack-free cheesecakes, but I was opening the oven to take photos, and ended up adding more time at the end to compensate, and apparently, from the look of the grand canyon-sized crack, it was a bit too long.

New York Style "Sunshine" Cheesecake - Crack isn't Necessarily WhackAccording to my sources deep inside the cheesecake underground, if for whatever reason, the internal temperature goes above 160 degrees F. the cake will crack when cooling. The good news is the taste and texture was absolutely perfect. The moral of the story? Don't be afraid to make cheesecake!Cheesecake purists believe "crack is whack," but truth be told, slightly overcooking this recipe is not a big problem, and the crevice causes no issues when you serve it (as you'll see with some state-of-the-art Photoshop effects).

Crack or no crack, this is a classic, dense, rich New York style cheesecake with just a hint of citrus, hence the "sunshine" in the title. I paired it with a lovely fresh strawberry sauce, which had a little dash of balsamic vinegar in it. I also filmed that, and will air it soon. With the holiday entertaining season rapidly approaching, keep this super easy cheesecake recipe in mind. Enjoy!


Recipe adapted from Chantals New York Cheesecake on Allrecipes.com
Crust Ingredients:
18 graham crackers
3 tablespoons melted butter
Filling Ingredients:
1/4 cup all-purpose flour
1 cup sour cream
1 tablespoon vanilla extract
4 (8 ounce) packages cream cheese
1 1/2 cups white sugar
2/3 cup milk
4 eggs
1 or 2 teaspoons freshly grated lemon zest
1 or 2 teaspoons freshly grated orange zest

Popular Posts